 Jacob Tomlinson
In this post we will cover automatically running our tests when we push new code to GitHub, and when contributors raise Pull Requests against our project.
Continuous Integration
Continuous Integration (CI) is an automated process which checks whether a contribution to a codebase meets all the criteria set out by the maintainers in order for it to be merged.
As the maintainer of our example is-number package we want folks to contribute to the project, but we need to check that their contribution doesn’t break anything or made the codebase worse in any way. So let’s set up some CI with GitHub Actions to run our tests and other checks whenever someone submits a Pull Request to the project.
GitHub Actions
GitHub Actions is a CI service, there are many out there. With Actions we can add some configuration to our codebase which will result in checks being run automatically on our repository. These checks are executed by runners which will run our workflows which are each made up of a series of steps.
Each of these things is highly configurable so it may be useful to refer to the GitHub Actions Documentation as we go.
Running tests
Let’s create our first workflow. In previous posts we spent time getting ourselves set up with pytest to test our code. With GitHub Actions we can automatically run pytest on each proposed change.
Our workflow will look something like this:
- Start a runner
- Clone our repository
- Install Python
- Install our project and its dependencies (including testing dependencies)
- Run our tests
We probably also want to run this workflow a few times with different configuration options to ensure things will work for a variety of users. For example we probably want to use a runner for each operating system we support.
Given our project is simple and written in pure Python we should be able to easily support Linux, Windows and macOS, so let’s have a runner for each of those.
We should also check each Python version we support. It is up to you which version you support. I personally tend to refer to NEP29 which recommends supporting all Python versions released in the last 42 months. At the time of writing that is 3.7, 3.8 and 3.9. So let’s run tests for each of these.
To make our workflow we need to create a new file called .github/workflows/ci.yaml. All YAML files in the .github/workflows directory will be picked up by GitHub Actions and executed.
Here’s an example workflow file which works through the steps we listed above.
name: CI

on: [pull_request, push, workflow_dispatch]

jobs:
  test:
    runs-on: ${{ matrix.os }}
    strategy:
      fail-fast: true
      matrix:
        os: ["ubuntu-latest", "windows-latest", "macos-latest"]
        python-version: ["3.7", "3.8", "3.9"]

    steps:
      - name: Checkout source
        uses: actions/checkout@v2

      - name: Setup python
        uses: actions/setup-python@v2
        with:
          python-version: ${{ matrix.python-version }}
          architecture: x64

      - name: Install
        run: |
          pip install -e .
          pip install -r requirements_test.txt

      - name: Run tests
        run: pytest
We start by giving our workflow a name and configuring when this workflow will run. GitHub Actions has a variety of options for triggering your workflow. Here we’ve chosen pull_request so that we test submissions from contributors, push so we test our repo after submissions have been merged and workflow_dispatch which allows us to manually trigger the workflow from the GUI too.
Next we have our jobs. We only have one job for now called test. Here we configure our test matrix, which specifies all the combinations of operating system and Python versions to use. We also set the runner’s operating system version.
Then we move on to our steps. Steps can be pre-packaged actions which you can find on the GitHub marketplace or bash scripts. Our first two step are official actions to check out our code and install Python.
Then we have two custom bash scripts, one to install our package and another to run pytest.
If we commit this config and push it up to GitHub we should be able to see things run under the Actions tab in our repository.
$ git add -A
$ git commit -m "Add GitHub Actions workflow"
$ git push
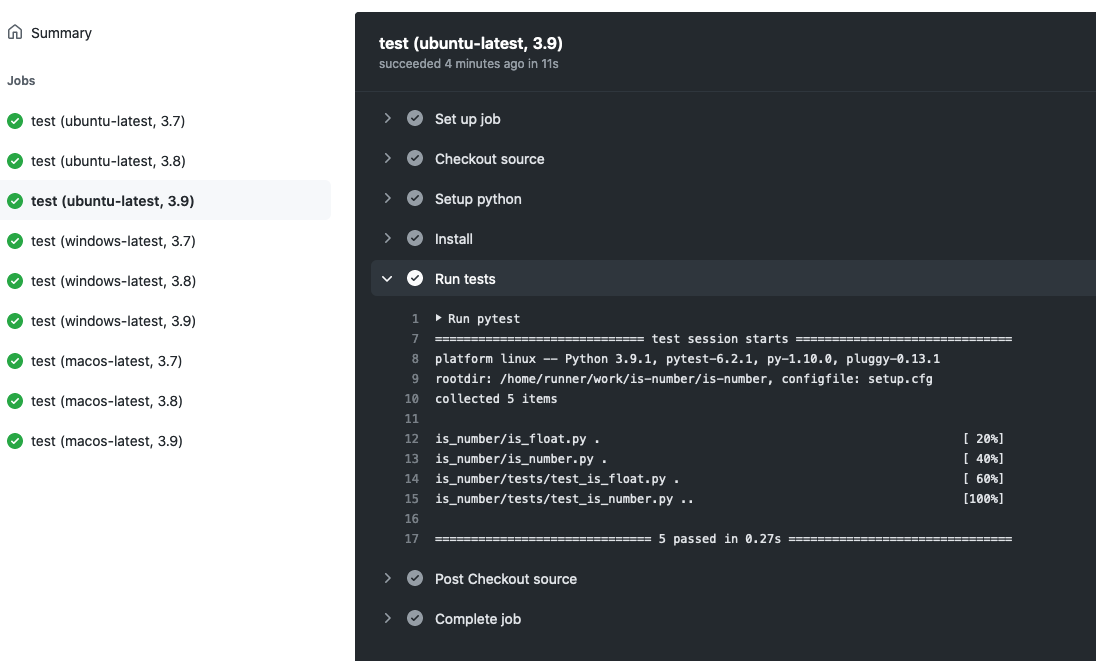
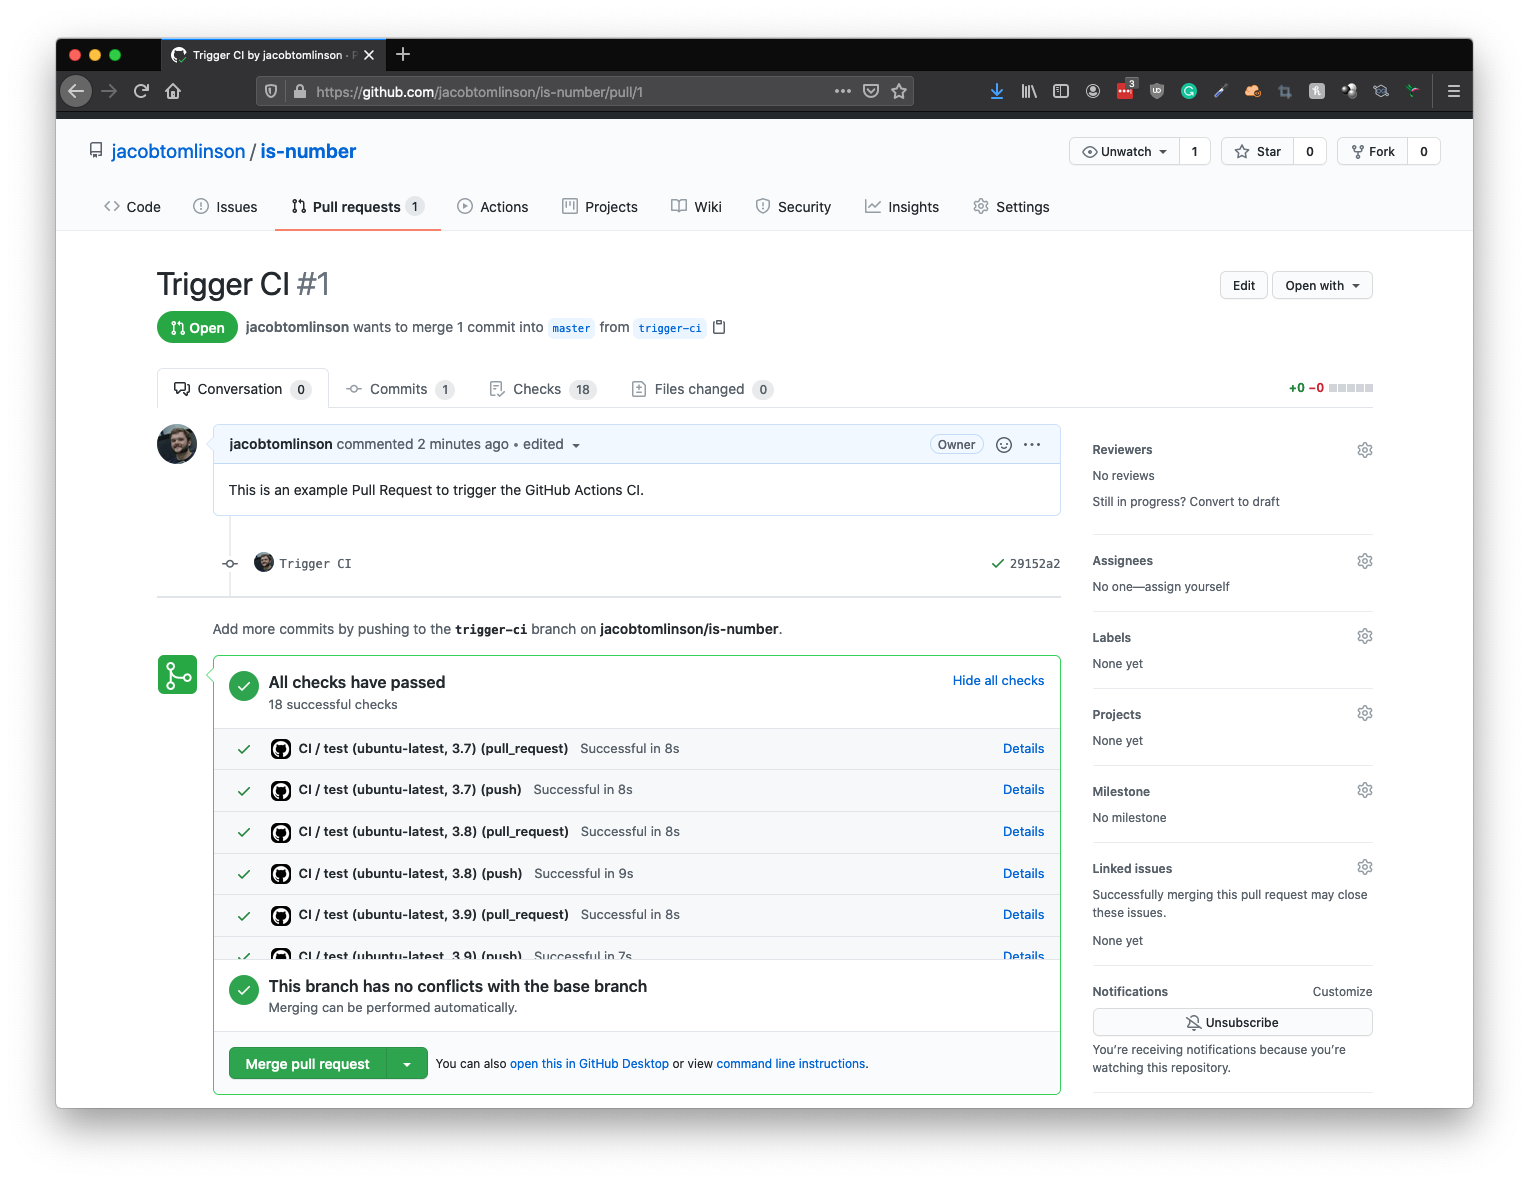
Now whenever someone makes a Pull Request against our repo these checks will run to ensure that the tests still pass in their version.
Testing formatting
In a previous post in this series we ran Black on our code to give it some consistent formatting. I have my editor set up to run Black on a file whenever I save it, but you can’t ensure all of your contributors will do the same. So let’s add another check which ensures our code meets our desired styling.
Pre-commit
We could add a check to our CI which runs black --check . which would test whether Black would make any changes to our files. But there is nothing more frustrating than pushing up a Pull Request to later find out that you forgot to run Black. To save ourselves from this we are going to set up some git pre commit hooks, and also use them for testing in our CI.
Git has some functionality which allows you to run scripts at various stages of your workflow. You can set these up yourself, or you can use the handy pre-commit framework to do it for you.
Let’s start by installing pre-commit.
$ pip install pre-commit
Next let’s add some pre-commit config in a file called .pre-commit-config.yaml.
repos:
  - repo: https://github.com/psf/black
    rev: stable
    hooks:
    - id: black
      language_version: python3
  - repo: https://gitlab.com/pycqa/flake8
    rev: 3.8.4
    hooks:
    - id: flake8
      language_version: python3
We are configuring two hooks, black and flake8.
- Black is the auto-formatter we used before which will consistently format our Python code.
- Flake8 is a Python 3 linter which will check out code for things like unused imports.
We also need to add a little config for flake8 to our setup.cfg file to ignore.
[flake8]
exclude = __init__.py,versioneer.py,_version.py
max-line-length = 120
Now we need to install these hooks.
$ pre-commit install
Every time we use git commit our project will be tested with these tools and our commit will be rejected if either of them fails.
We can check everything works correctly by running pre-commit manually.
$ pre-commit run --all-files
black....................................................................Failed
- hook id: black
- files were modified by this hook

reformatted /Users/jtomlinson/Projects/jacobtomlinson/is-number/is_number/__init__.py
reformatted /Users/jtomlinson/Projects/jacobtomlinson/is-number/is_number/is_float.py
All done! ✨ 🍰 ✨
2 files reformatted, 6 files left unchanged.
flake8...................................................................Passed
Oops it looks like my edit hadn’t been running black automatically, so pre-commit formatted a couple of files. Let’s commit those.
$ git add -A
$ git commit -m "Pre-commit"
black....................................................................Passed
flake8...................................................................Passed
[master c865ee7] Pre-commit
 5 files changed, 29 insertions(+), 2 deletions(-)
 create mode 100644 .pre-commit-config.yaml
We can see that on each commit our hooks are called and checked.
Each developer will need to install pre-commit and the hooks in their local environment. So we should add a CI check to ensure the hooks pass, and also add a section to the README.rst telling them how to set it up.
Updating the README
Let’s start with the README. Let’s add a section along the lines of the following. I’m putting this above the Testing header that we added previously.
Developing
----------

This project uses ``black`` to format code and ``flake8`` for linting. We also support ``pre-commit`` to ensure
these have been run. To configure your local environment please install these development dependencies and set up
the commit hooks.

.. code-block:: bash

   $ pip install black flake8 pre-commit
   $ pre-commit install
Updating our CI
We can add another workflow file for GitHub Actions. Let’s call it .github/workflows/pre-commit.yaml.
We only care about our linting and formatting here, so we don’t need to run on multiple operating systems or Python versions. We just grab our code and use the official pre-commit action to check our hooks pass.
name: pre-commit
on: [pull_request, push, workflow_dispatch]

jobs:
  lint:
    runs-on: ubuntu-latest
    steps:
      - uses: actions/checkout@v2
      - uses: actions/setup-python@v2
      - uses: pre-commit/action@v2.0.0
Let’s add this new workflow, push it to GitHub and watch it run.
$ git add .github/workflows/pre-commit.yaml
$ git commit -m "Add pre-commit action"
$ git push

Coverage
One last thing we can test as part of our CI is code coverage.
Code coverage is a measure of the number of lines of code that were executed by your tests. In theory we want every line of our code to be tested at least once, if not more. Just because a line is covered doesn’t mean it is well tested, but it’s a start. I’ve worked on projects in the past with 100% test coverage, but most of the tests were garbage designed to hit the lines.
But test coverage can be really useful to see what areas of your project could do with more testing. Seeing coverage trending upwards over time is also a good measure on the health of your tests.
As we are using pytest for our testing we need to add the coverage plugin. So add pytest-cov to your requirements_test.txt file and update your dependencies.
$ pip install --upgrade -r requirements_test.txt
We also need to tell coverage to measure code in the current directory. We can do this in the pytest section of our setup.cfg.
[tool:pytest]
addopts = --doctest-modules --cov=./
To configure our coverage reports we need to create a new file called .coveragerc. For now we will just omit some files that we don’t want to test coverage on, including versioneer and our setup.py.
[run]
omit =
    setup.py
    versioneer.py
    is_number/_version.py
Now if we run pytest again we should see a .coverage file appear in our project directory. This will already be included in your .gitignore if you are following along with the series. This file contains a list of the lines that were tested.
The last thing we need to do is have our CI push our coverage report somewhere we can view it. For this we are going to use Codecov.
Codecov have an official GitHub Action so open up your .github/workflows/ci.yaml file and add one more step to the end.
- name: "Upload coverage to Codecov"
  uses: codecov/codecov-action@v1
Now we can commit this and push it up to see things in action.
$ git add -A
$ git commit -m "Add coverage reports"
$ git push
Then once the Action has completed you can head to Codecov and log in with Your GitHub account. From there you should be able to navigate to your project and view your coverage report.
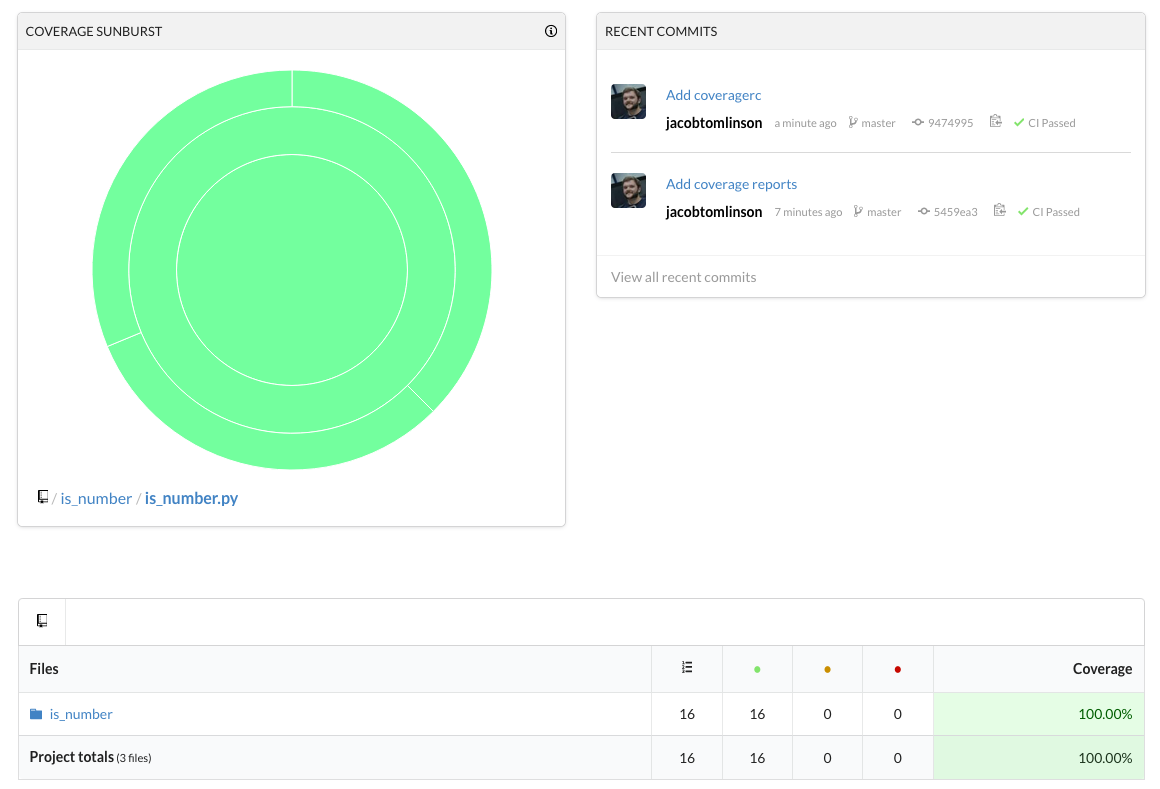
Codecov will also run as a check on your pull requests.
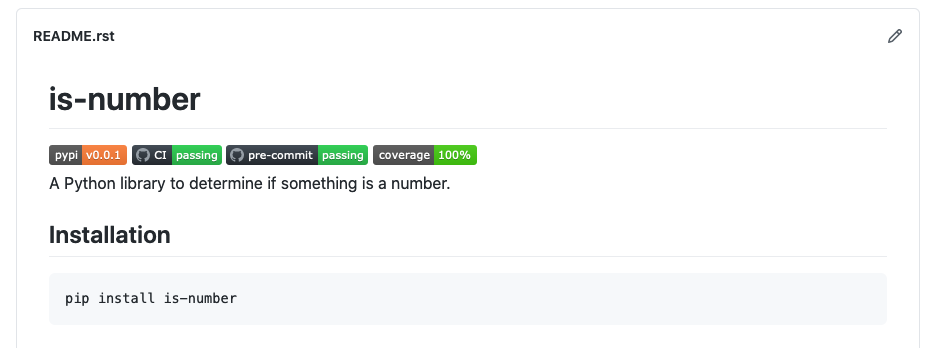
Badges
To wrap up let’s add some more badges to our README file. We already have a badge from PyPI, but let’s add some more for GitHub Actions and Codecov.
GitHub Actions
For GitHub Actions we are going to use their own badges. So head to the “Actions” tab in your repo and select the CI workflow from the list on the left. Then on the right hand side click the three dot menu dropdown and select “Create status badge”.
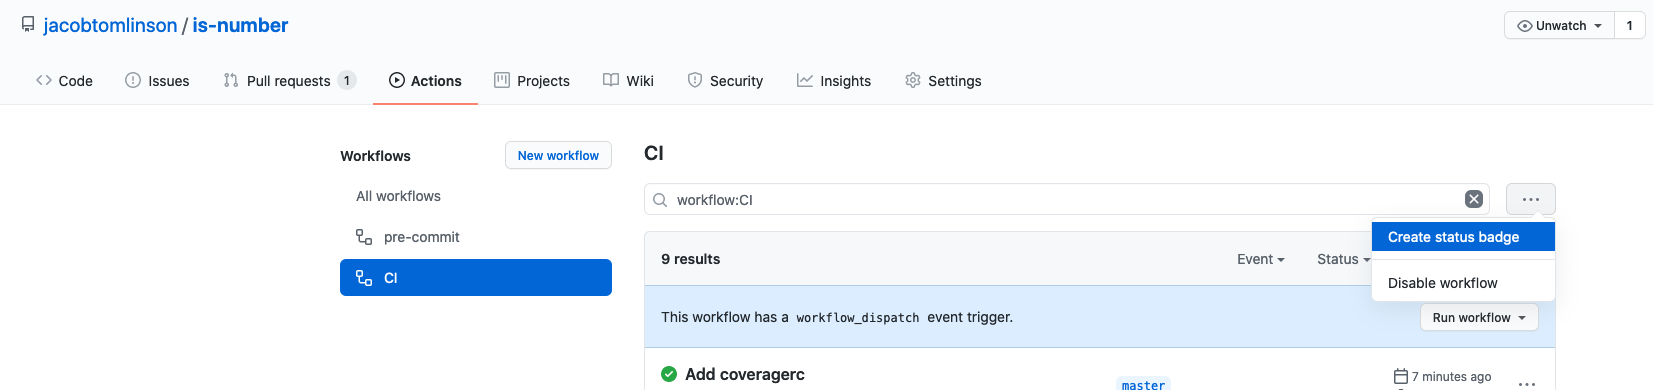
A box will pop up with a markdown example, but as we are using RST just copy the URL for the badge.
Then open your README.rst file and under the existing image directive for the PyPI badge add a second one that looks like this.
.. image:: https://github.com/jacobtomlinson/is-number/workflows/CI/badge.svg
   :target: https://github.com/jacobtomlinson/is-number/actions?query=workflow%3ACI
   :alt: GitHub Actions - CI
Where the image URL is the one you copied, the target is the workflow page you copied it from and the alt has the workflow name in it.
Do the same for the pre-commit workflow.
.. image:: https://github.com/jacobtomlinson/is-number/workflows/pre-commit/badge.svg
   :target: https://github.com/jacobtomlinson/is-number/actions?query=workflow%3Apre-commit
   :alt: GitHub Actions - pre-commit
Then let’s head to shields.io to generate a badge for our coverage. In the search box enter codecov and choose the regular Codecov badge. Choose gh from the VCS dropdown and enter your org and repo name. You should see a preview of the badge below. Click the “Copy badge URL” button and then construct an image directive like so.
.. image:: https://img.shields.io/codecov/c/gh/jacobtomlinson/is-number
   :target: https://app.codecov.io/gh/jacobtomlinson/is-number
   :alt: Codecov
Now commit your changes, push them up to GitHub and check our your new README badges.
$ git add README.rst
$ git commit -m "Add more badges"
$ git push
Summary
In this post we have covered:
- Running pytest with GitHub Actions
- Checkout our code is formatted with black and flake8 using pre-commit
- Run those pre-commit checks with GitHub Actions
- Add coverage reports to pytest
- Publish those reports to Codecov
- Add more badges to our README
In future posts we will cover:
- Automating future releases
- Generating documentation and hosting it
- Creating a community
- Handling future maintenance