 Jacob Tomlinson
In this post we will cover making our code available to people. This is the bit where we open the source! We will push our code to a code posting platform and then package up our library and submit it to a couple of repositories to make it easy for people to install.
Code Hosting
There are many services available for publishing your version controlled project with features such as bug trackers, change review and publishing tools. These platforms will be the place where your community gathers. Users will report bugs and request new features and contributors will submit patches and modifications to the codebase.
As we have used git for our version control a good place to publish this package would be GitHub. However there are alternatives such as BitBucket and GitLab that we could use instead.
To get started you’ll need to sign up for a GitHub Account.
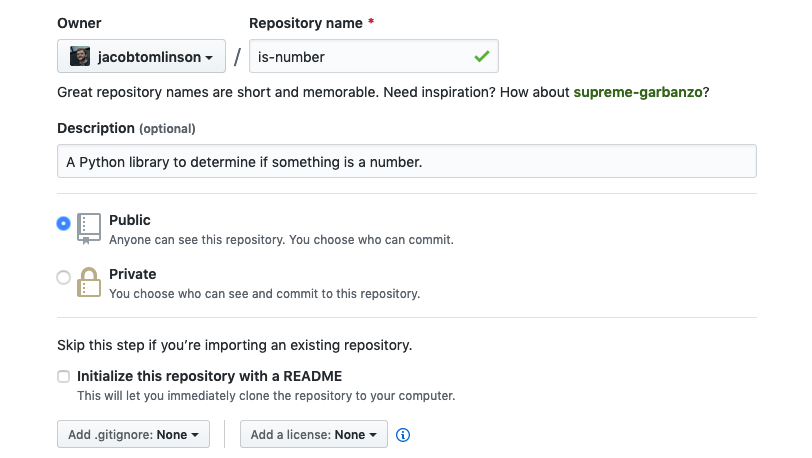
Then you click the “New repository” button in the drop-down menu in the top right.

Then you need to give your repository a name and a description and click the “Create repository” button.
Lastly you need to tell your local git repo that you have created a remote repository and that you want to push your code up there.
git remote add origin https://github.com/jacobtomlinson/is-number.git
git push -u origin master
We should also push our version 0.0.1 tag that we created before.
git push origin master --tags
Now if you reload the page we should see our codebase available on GitHub.
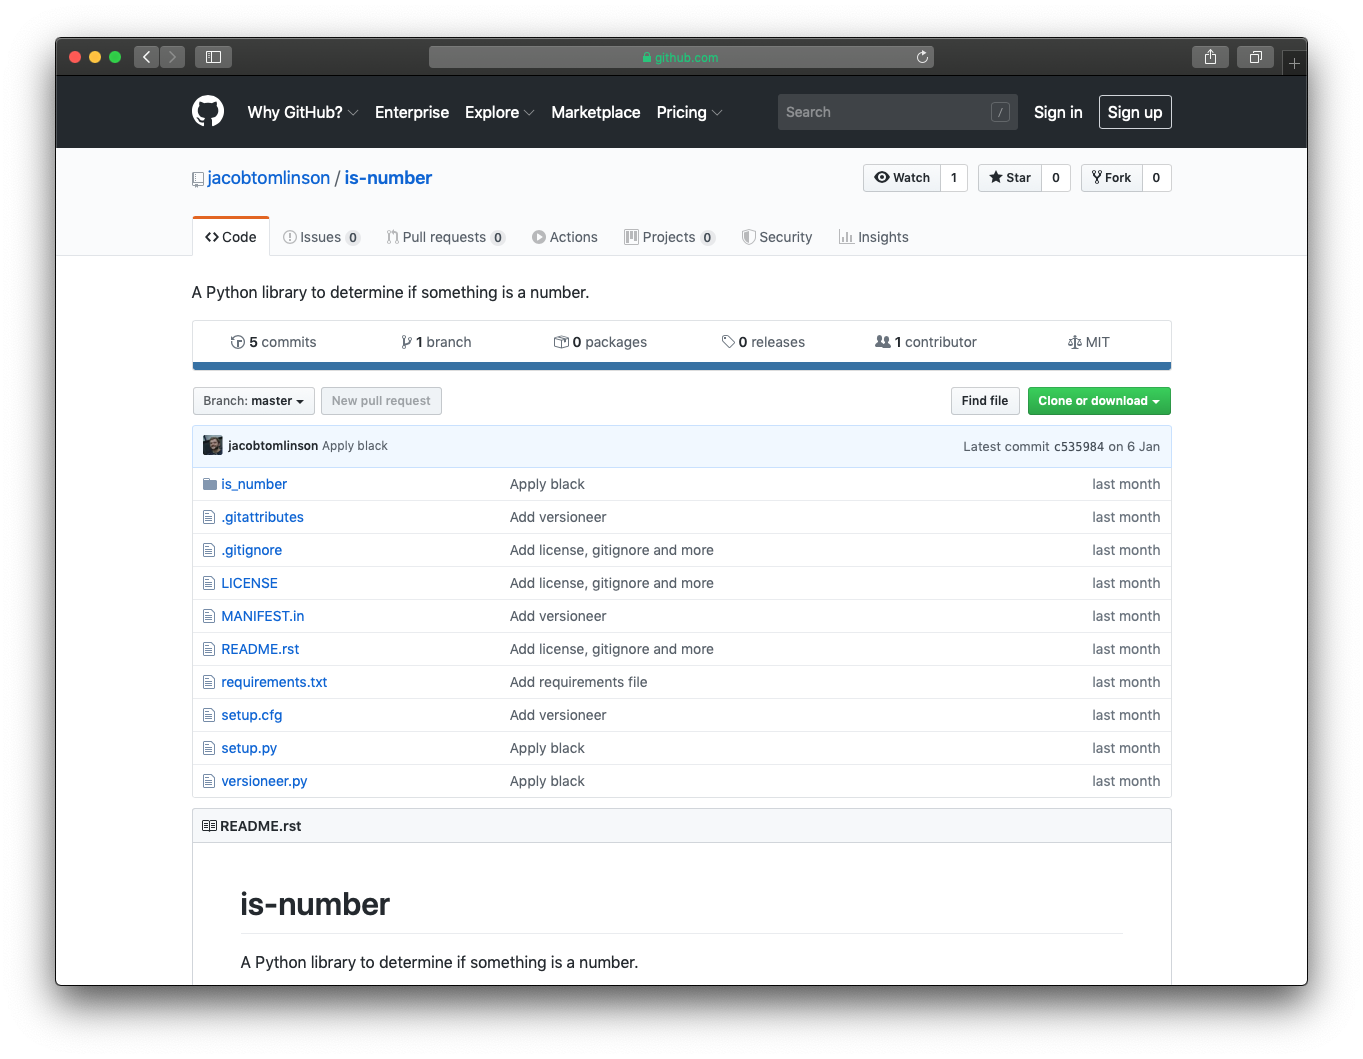
Note our README is automatically displayed on the page and we can see our commit history in the file explorer.
Releasing/Deployment
Now that our code is available for anyone to see and use let’s look at packaging it up to make it easy for people to install.
Technically folks can already install our package using our published repository on GitHub. A common tool for installing python packages is pip and it supports installing directly from a git repo.
pip install git+https://github.com/jacobtomlinson/is-number.git#egg=is-number
This can be useful if you want to share your project with people for testing or install an unreleased version from the master branch. But to make it accessible to the masses we will want to bundle it up and publish it in a couple of different places.
PyPI
Instead of insisting people install directly from our source repository we can bundle up our code and publish it to the Python Package Index (PyPI). PyPI is the default place for pip to look for packages when installing, you give your package a short name and publish it to PyPI, then folks can install it using that short name.
pip install mypackage
Then when you publish new versions user’s can also use pip to upgrade to the latest version.
pip install --upgrade mypackage
To publish our package we need to register an account.
Then we need to clean up our repository ready for packaging. We can do that by running a command to remove everything in our local folder which has not been tracked with git.
git clean -xfd
Next we need to build our wheel for our package. A wheel is Python’s packaging format. It is basically just a zip file of our source code with the .whl extension and the file name contains some metadata about the package.
python setup.py sdist bdist_wheel
After running this command you will see a load of new files have been generated in your local directory. We don’t actually need to worry about any of these files, but if you’re curious you can check the dist/ directory to see our built wheel.
$ ls dist
is-number-0.0.1+1.gc535984.tar.gz
is_number-0.0.1+1.gc535984-py3-none-any.whl
We can see here we have built the is-number package at version 0.0.1+1.gc535984. This is because after we tagged version 0.0.1 we ran Black on our code and committed the changes. This means the current version of our working directory is 0.0.1 plus 1 commit with the ID gc535984.
We don’t really want to push an unclean version like this to PyPI so we have two options here, we could tag a new version, or check out the old version. As the changes were only code formatting let’s check out the old version and build that instead.
We should clean out these temporary files again first.
git clean -xfd
Now check out version 0.0.1
git checkout 0.0.1
If we run our build command again and list the dist/ directory we should see just version 0.0.1.
$ python setup.py sdist bdist_wheel
$ ls dist
is-number-0.0.1.tar.gz           is_number-0.0.1-py3-none-any.whl
Excellent! Now that we have our versioned package we want to push it to PyPI. Provided your package has a unique name you do not need to create it before hand, you can check by searching your chosen package name on PyPI. To upload our package we are going to use twine which is a utility for uploading to PyPI.
pip install twine
Then use twine to upload our wheels. It will prompt you for your username and password.
$ twine upload dist/*
Enter your username:
Enter your password:
Uploading distributions to https://upload.pypi.org/legacy/
Uploading is_number-0.0.1-py3-none-any.whl
100%|██████████████████████████| 5.85k/5.85k [00:00<00:00, 17.5kB/s]
Uploading is-number-0.0.1.tar.gz
100%|██████████████████████████| 20.1k/20.1k [00:01<00:00, 11.7kB/s]

View at:
https://pypi.org/project/is-number/0.0.1/
We can now visit our package on PyPI.
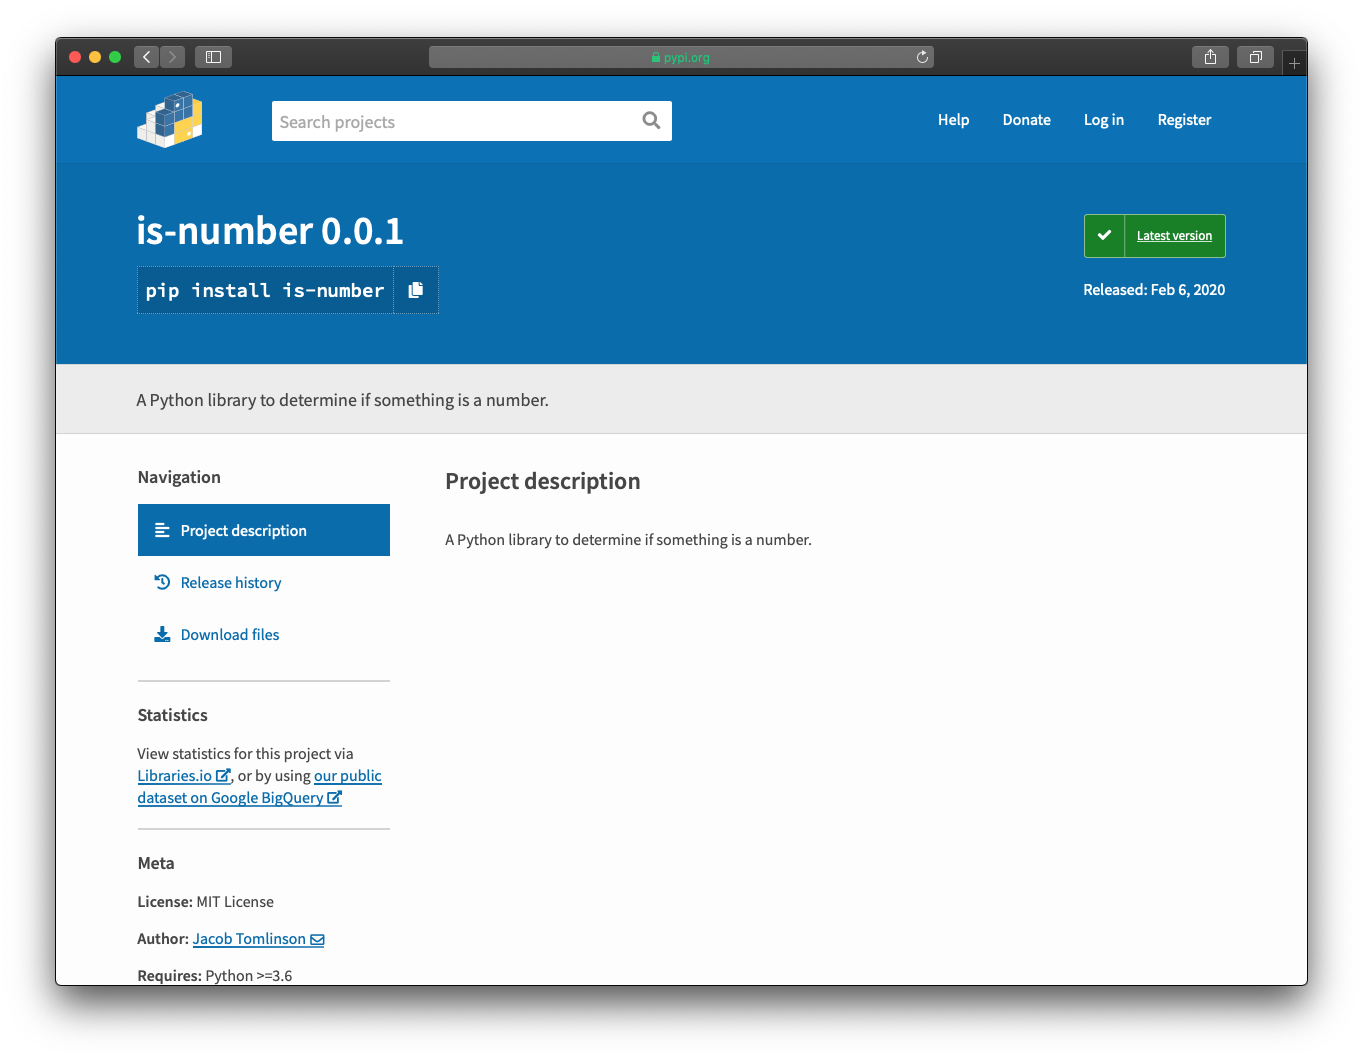
Our users can now install it with pip, you can try it yourself if you like.
pip install is-number
We should also checkout our master branch again so we can continue working on our project.
git checkout master
Updating our README
The last thing we should do is add this information to our README. We should tell people the command to install the package and also provide a link to the package on PyPI.
It is common place to provide links like this using badges. Many different tools we will come across use badges to communicate information, whether it is package versions, build statuses, etc. An excellent place to get badges for your project is shields.io which is a web service to dynamically generating badge images to use in your README.
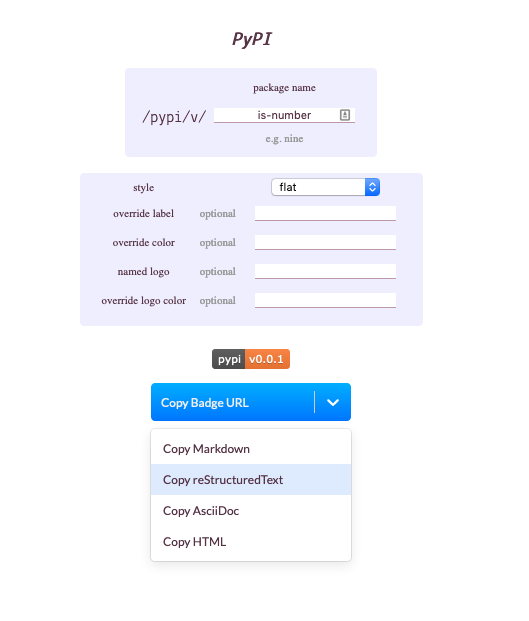
If you head to shields.io, search for PyPI and select the then click the PyPI Version badge.

We can then enter the name of our package and it will show us a preview of our badge and give us an opportunity to copy an RST link to the badge.
Then we should head to our README.rst file and update it with our badge and install instruction.
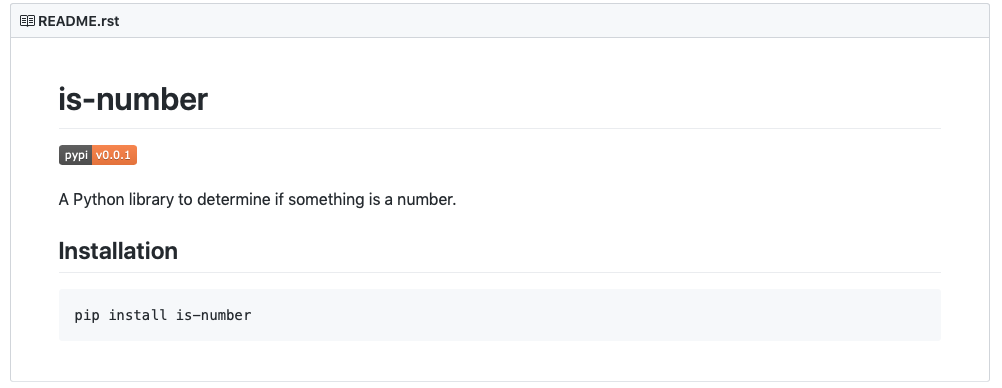
is-number
=========

.. image:: https://img.shields.io/pypi/v/is-number
   :target: https://pypi.org/project/is-number/
   :alt: PyPI

A Python library to determine if something is a number.

Installation
------------

.. code-block:: bash

   pip install is-number
Then we need to add these changes, commit to git and push to GitHub.
git add README.rst
git commit -m "Add PyPI badge and pip install command"
git push origin master
We can now reload our page on GitHub and see our updated README.
Conda Forge
In addition to pip many people also use the conda package manager from Anaconda. There are a few differences between the two package managers but I don’t really want to get into the details of that here, you can have a read of posts like this for yourself. Whether you use pip or conda it is important for us to note that both communities exist and we should make our package available to as many people as possible.
To make our package available via conda we have a couple of options.
The first is that we could create our own channel on Anaconda Cloud and publish our package to it. However that will require users to specify this custom channel when they install your package.
conda install -c mychannel mypackage
This approach is more common when large organisations wish to provide many packages with complex dependencies. You may even wish to repackage dependencies and make them available on your channel.
For open source developers who just want to release a couple of individual packages you can publish your package to Conda Forge. Conda Forge is a community of package maintainers with an automated system for publishing to the conda-forge channel on Anaconda Cloud.
To add our package to Conda Forge we need to write a recipe and contribute it to the staged-recipes repository on GitHub. A conda recipe is similar to the setup.py file we created before, but includes a little more information particularly around building and testing the package.
You will need to fork that repository and clone it locally. Then create a new folder under recipes and a new file in there called meta.yaml.
{% set name = "is-number" %}
{% set version = "0.0.1" %}

package:
  name: {{ name|lower }}
  version: {{ version }}

source:
  url: https://github.com/jacobtomlinson/{{ name }}/archive/{{ version }}.tar.gz
  sha256: 890ea2b8aa999154853c7aa862af1d709df696c4c8b4d6e7533904ec514f273b

build:
  noarch: python
  number: 0
  script: "{{ PYTHON }} -m pip install . -vv"

requirements:
  host:
    - python >=3.5
    - pip
  run:
    - python >=3.5

test:
  imports:
    - is_number

about:
  home: https://github.com/jacobtomlinson/is-number
  license: MIT
  license_family: MIT
  license_file: LICENSE
  summary: 'A Python library to determine if something is a number.'
  description: |
    A Python library to determine if something is a number.
  doc_url: https://github.com/jacobtomlinson/is-number
  dev_url: https://github.com/jacobtomlinson/is-number

extra:
  recipe-maintainers:
    - jacobtomlinson
We start by specifying the name of the package. Then we have to tell Conda Forge where to find the source for it. As we already have our package on PyPI we can point to that and use the Jinja2 templating to automatically fill in the URL for us. We should also specify the sha256 hash for the file to ensure nobody tampers with our recipe. We can calculate this by downloading the package ourselves, checking the contents and then generating the hash.
wget https://github.com/jacobtomlinson/is-number/archive/0.0.1.tar.gz
tar xvzf 0.0.1.tar.gz
cat is-number-0.0.1/is_number/__init__.py  # Check this is what you expect
If you are happy then generate the hash and update the recipe.
$ openssl sha256 0.0.1.tar.gz
SHA256(0.0.1.tar.gz)= 890ea2b8aa999154853c7aa862af1d709df696c4c8b4d6e7533904ec514f273b
Next we specify how to build our package. As we are just making a simple Python package we can just use pip to install it. We also need to ensure our build number starts at 0.
Then we specify our requirements. For this example we just need Python and pip, but if we had put something into our requirements.txt file we would also need to specify that here. This is one downside of Conda Forge, if your dependency is not available on Conda Forge you may need to add the recipe for it yourself and take on the maintenance burden of keeping it up to date.
Next we specified a test, for this package we just check that we can import it.
We then add some metadata about the package, this is mostly copied from the setup.py file.
Lastly we add a list of maintainers of the recipe. This is because once this recipe has been accepted Conda Forge will automatically create a “feedstock” which is a separate repository on GitHub which contains this recipe and some automations for it. It will also automatically detect new releases on PyPI and make a Pull Request against the feedstock with an updated version and hash. It is up to you as the recipe maintainer to review and merge this Pull Request as there may need to be come changes to the recipe. Anyone listed here in the recipe-maintainers section will have the ability to review and merge these PRs, just be sure that you only list folks here who have given explicit permission to do so.
Once we have this file created in our fork we need to commit the changes and open a Pull Request to Conda Forge. The friendly folks there will review the submission and possible ask for some tweaks and changes to ensure the recipe is good quality. Then once that has been merged your users will be able to install your package via Conda Forge.
conda install -c conda-forge is-number
Summary
In this post we have covered:
- Publishing our code on GitHub
- Packaging our code on PyPI
- Packaging our code on Conda Forge
In future posts we will cover:
- Adding tests
- Automating those tests
- Automating future releases
- Generating documentation and hosting it
- Creating a community
- Handling future maintenance