 Jacob Tomlinson
Helm has become a pervasive tool in the Kubernetes community for packaging, managing, upgrading and distributing applications. It uses a packaging format called charts which are a collection of templates that describe Kubernetes resources and can be configured by the user.
Helm supports repositories for charts, which are HTTP web servers that serve an index.yaml manifest file describing the available charts, along with the chart payloads themselves. These are tar gzip files containing the resource template files and metadata. The manifest contains additional information about each chart including versions of both the chart and the application, urls for the project and source code, human readable descriptions and more.
The Kubernetes and Helm communities maintain a central charts repository in a single monorepo. However there has been a shift recently towards federated repositories that are owned and managed by communities and a central search index called Helm Hub. This allows Kubernetes users to still have a central place to look for charts, but reduces the maintenance burden on the Helm maintainers.
The result of this is that communities will need to set up their own repository, register it with Helm Hub and manage it themselves. This post will talk through creating a repository yourself using Chartpress, hosting it as a static site using Jekyll on GitHub Pages and testing and deploying charts to it automatically using Travis CI.
Creating a chart
First let’s create ourselves a chart that we will host in our repository. We are going to store everything in a single git repository (not to be confused with our Helm repository) so let’s start with that.
# Create a directory
mkdir mychartrepo
cd mychartrepo

# Initialize out git repository
git init .

# Create a barebones readme and make an initial commit
echo "# My Chart Repo" > README.md
git add README.md
git commit -m "Initial commit"
Now that we have a git repo to store our work in let’s create our first Helm chart. We can use the helm command line tool to do this.
helm create example
This will create an example directory and put a skeleton chart in it which contains minimal resources for creating an nginx web server.
Optional: Test locally
If you have your Kubernetes environment configured we can already test out our new chart by running helm install example --name example.
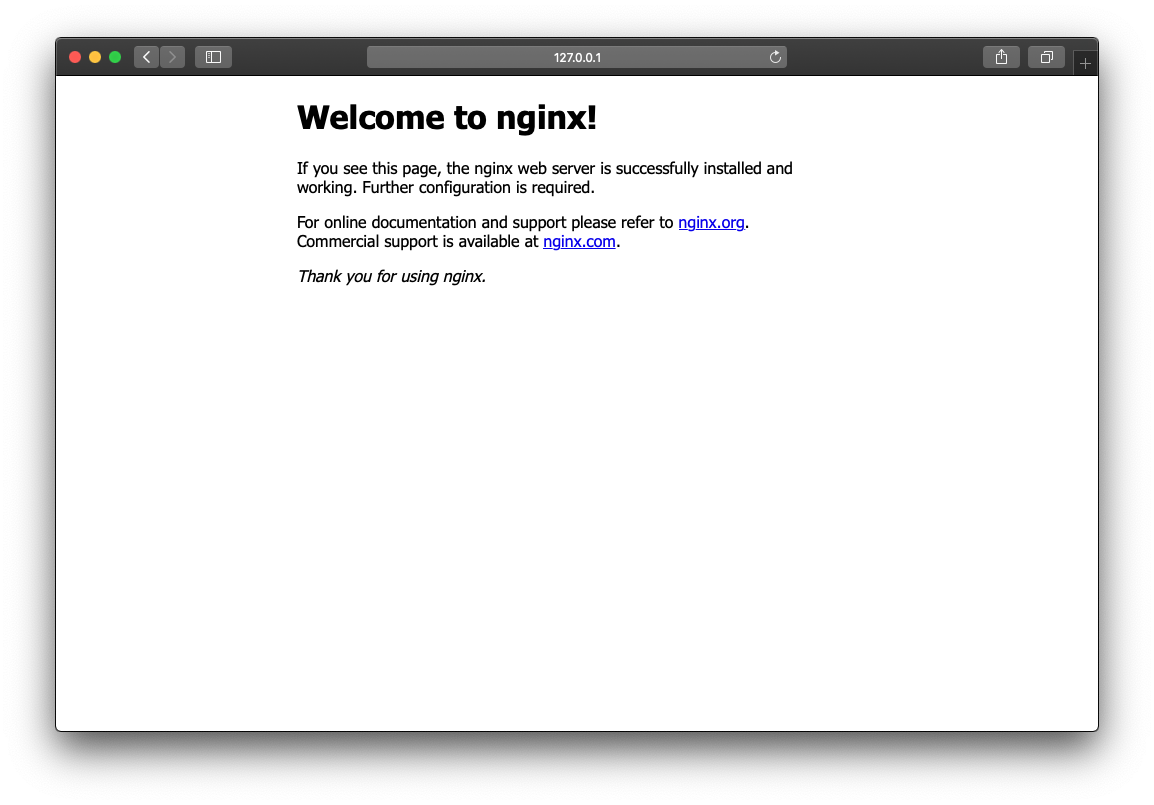
You should be able to follow the instructions that are printed on the screen to get access to our test deployment of our example chart and view our example nginx deployment running in your browser.
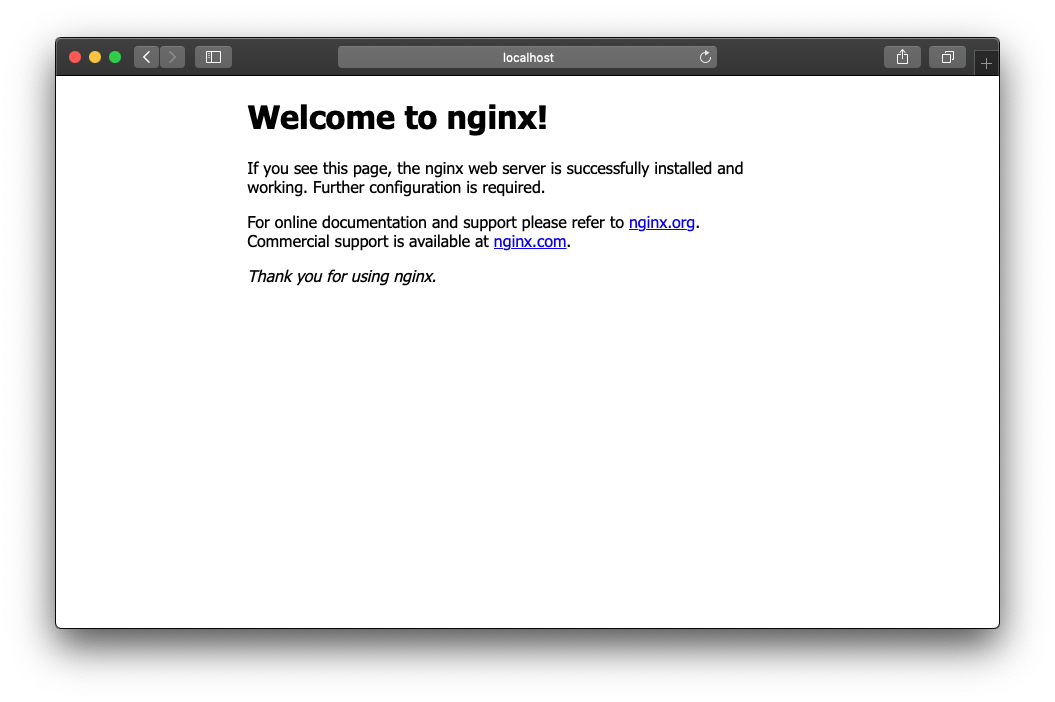
We can clean this up again by running helm delete example.
Push to GitHub
We should also push our git repository up to GitHub at this point. First we need to create our repository on GitHub:
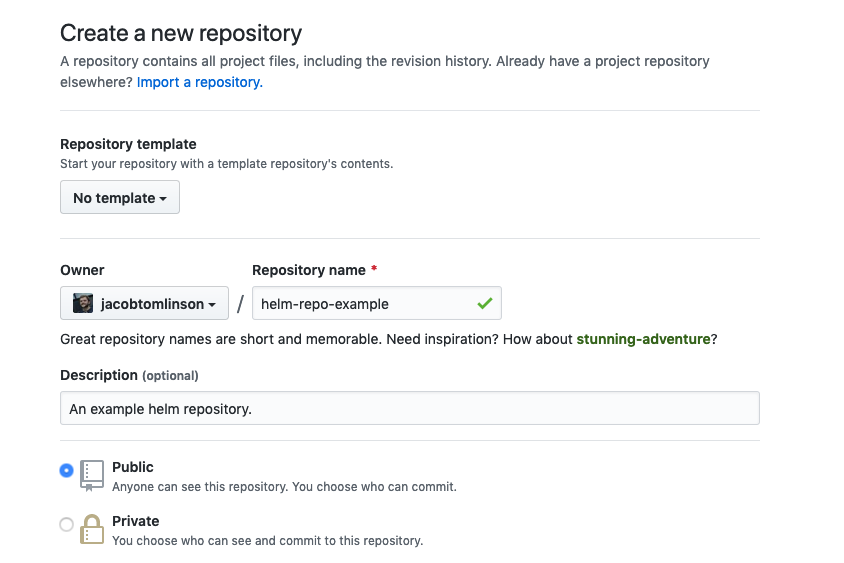
Then we need to push our local git repository up:
git remote add origin git@github.com:you/your-repo.git
git push -u origin master
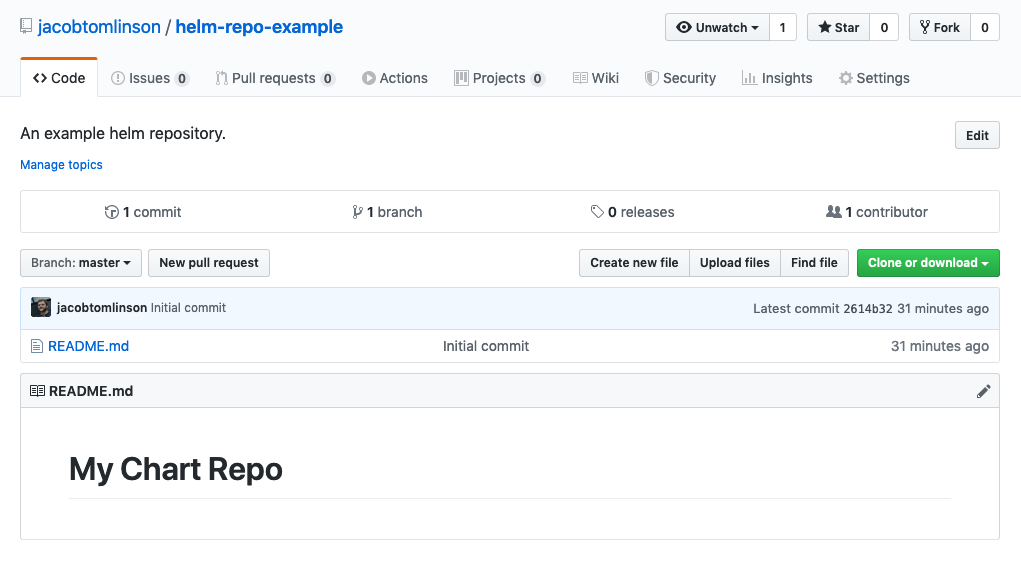
Note: We haven’t committed our example chart yet so we will just see our initial README commit on GitHub.
Linting it with Travis CI
For your project you will certainly want to modify the chart to deploy your actual application or you may have an existing chart that you are wanting to add to your repository. Either way this tutorial isn’t going to cover how to write a helm chart, there are already great resources in the Helm documentation. We are going to continue working here with our example chart without modifying it much, but you may want to make your changes and get your chart in place here.
Before we deploy our chart to our repository and share it with the world we may want to do some testing. The most simple testing we can do is to run helm lint on our chart. This tests whether our templates compile and are installable by Helm, it does not however test whether the chart will successfully deploy your application.
We can test our chart locally like so:
$ helm lint example
==> Linting example
[INFO] Chart.yaml: icon is recommended

1 chart(s) linted, no failures
Our example chart lints successfully here with one warning to say that we should probably add an icon URL to the Chart.yaml file. This is a good suggestion because this icon will be displayed next to your chart listing on Helm Hub so let’s add an example icon to our chart.
# example/Chart.yaml
apiVersion: v1
appVersion: "1.0"
description: A Helm chart for Kubernetes
name: example
version: 0.1.0
# Let's use the Kubernetes logo from wikipedia for our example chart. You will want to use your own logo in yours.
icon: https://upload.wikimedia.org/wikipedia/commons/thumb/3/39/Kubernetes_logo_without_workmark.svg/1280px-Kubernetes_logo_without_workmark.svg.png
If we lint again now we should see the warning has gone away.
Next we should automate our linting with a continuous integration service. In this guide we will use Travis CI, but there are many good CI services to choose from. To get started with Travis you need to log in with your GitHub account and allow permissions for Travis to see your repositories. You then need to select which repositories to build and you should enable the new repo we just created. Nothing will actually happen at this point as we need to add some config for Travis.
Full instructions for getting start on Travis can be found here.
To get Travis to automatically lint our charts we need to configure Travis to install helm and run helm lint on our chart. This will be triggered automatically when we push to the master branch or raise Pull Requests on GitHub. We do this by creating a .travis.yml file in the root of our project.
# .travis.yml
sudo: required

language: python
python:
  - "3.6"

install:
  - curl https://raw.githubusercontent.com/kubernetes/helm/master/scripts/get | bash
  - helm init --client-only

script:
  - helm lint example
In our config we have chosen Python as our base language as that will make some steps easier later. We then add install commands to set up helm and a script command to run helm lint.
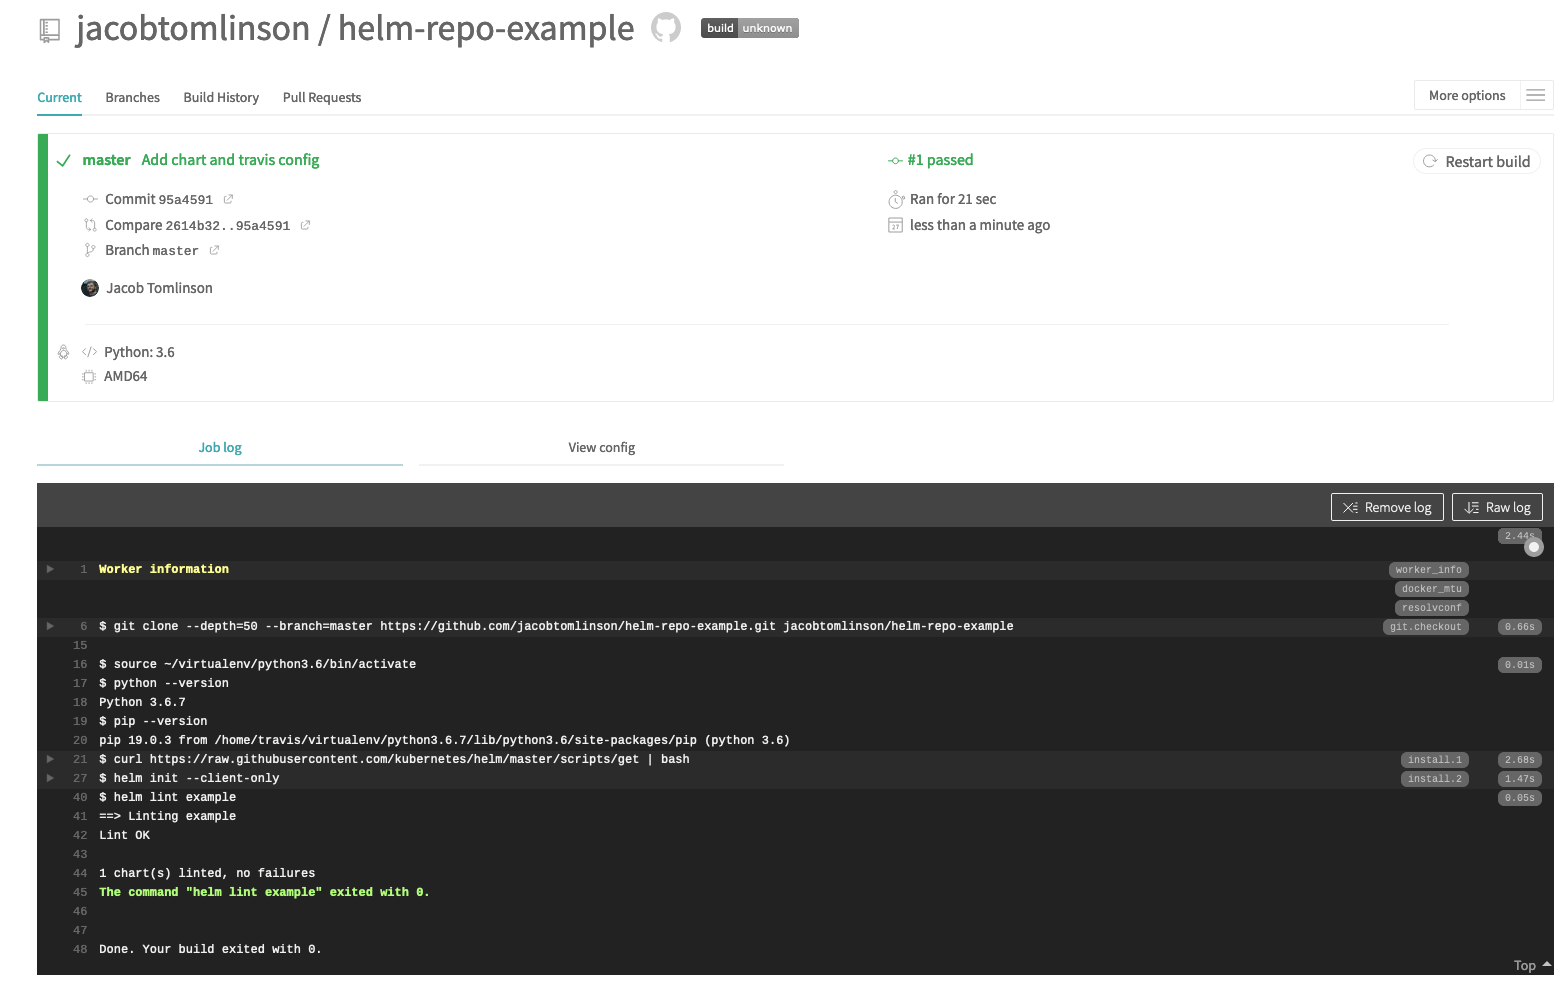
If we then commit and push our chart along with our Travis config and check out the build over at travis-ci.com we should see it successfully lint and pass the build.
Setting up the static site on GitHub Pages
Now that we have our chart and we know it builds successfully we need somewhere to package it up and serve it from. To do this we are going to create a new orphan branch in our repository and serve a GitHub pages site from this branch.
GitHub Pages allows you to serve a website directly from a repository on GitHub, which is perfect for our use case here. However we don’t want to be publishing the source of our charts, but rather we want to bundle our chart up into payloads and generate an index.yaml file describing the charts available in the repository. This is why we will be creating an orphan branch, which is effectively a blank branch that is part of our repository.
git checkout --orphan gh-pages
We’ve created a new branch called gh-pages which is the default branch that GitHub Pages will look to serve a website from. If we run git log from here we will see that there are no commits on this branch, but you will notice all your files still exist locally. This is because when you create an orphan branch it doesn’t have any reference point to do a hard reset to so we need to clean up these files ourselves.
git reset
git clean -xfd
This should now leave us in an empty directory that we can begin working on our GitHub pages site in. To start we will just create a quick index file to check that GitHub Pages is working correctly.
---
# This little section with the `---` fences is called frontmatter.
# Don't worry about this for now, it'll become clear when we get on to Jekyll.
---

# Hello GitHub Pages
Now let’s commit this file and push it up to the gh-pages branch on GitHub.
git add index.md
git commit -m "Initial GitHub Pages commit"
git push origin gh-pages
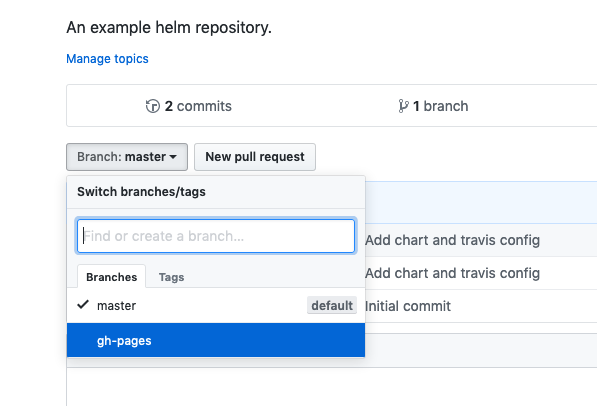
We should now be able to switch to our gh-pages branch on GitHub and see our new branch with a separate lineage to the master branch containing just out index.md file.
If you now visit the Settings section of your repository and scroll down to the GitHub Pages area you should see the URL that your GitHub Pages site is being hosted at.
I’m actually going to take things one step further and configure a custom domain here for my Helm chart repository, but that’s mainly because I’ve messed around with my GitHub account too much and the default option doesn’t work for me. So this is totally optional, your chart will work just fine using the default options.

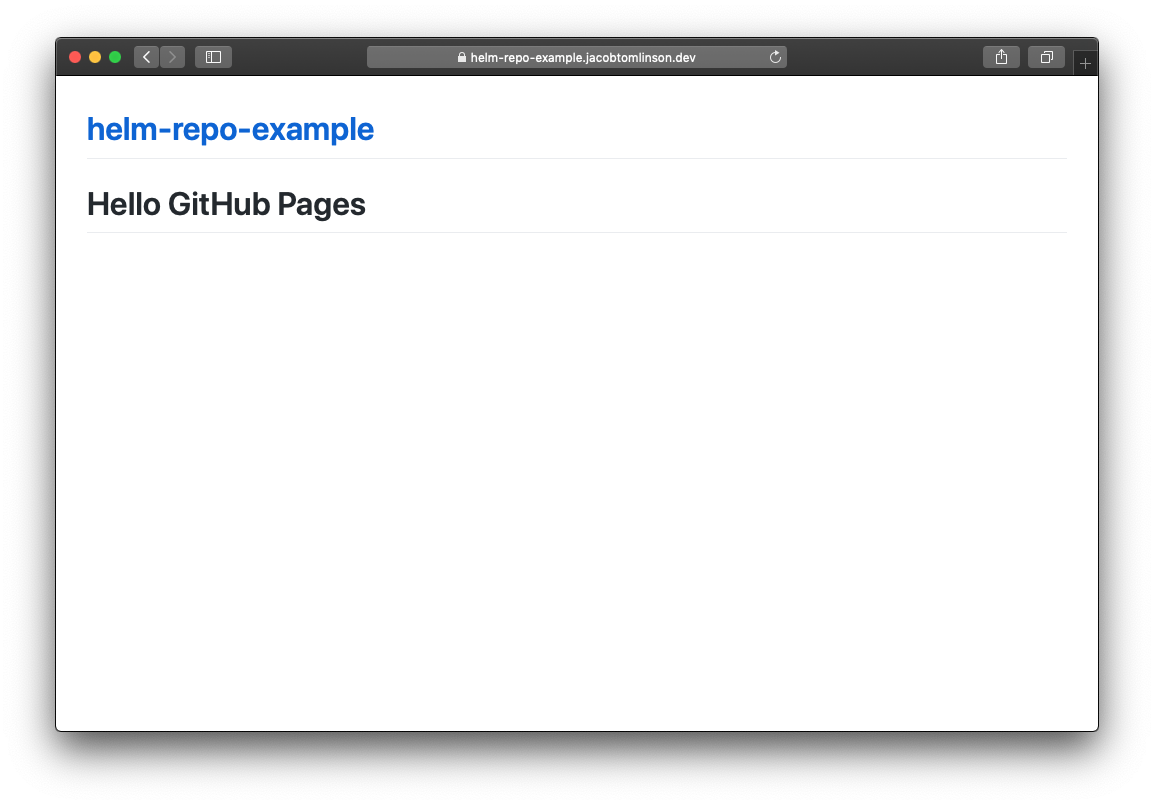
Now if we click the link where it says our site is published (yours may look like https://yourusername.github.io/reponame/) we should see our example index page.
Building the repository
Now that we have a web server on GitHub Pages and we’ve tested that we can add content there we can build our Helm chart repository.
To do this we are going to use Chartpress which is a tool for building and publishing Helm chart repositories. It can also build Docker images and publish them to Docker Hub if you need custom images for your chart.
Let’s switch back to our master branch because this is where our chart is and where the Chartpress config needs to live. The gh-pages branch is just for the built payloads to be stored in a served from.
git checkout master
Install Chartpress:
pip install chartpress
Our chartpress config will live in a file called chartpress.yaml, so let’s create that in the root of our project.
# chartpress.yaml
charts:
  - name: example
    repo: # This should be your GitHub repo name and the url where our GitHub Pages site is being published
      git: jacobtomlinson/helm-repo-example
      published: https://helm-repo-example.jacobtomlinson.dev/
Before we can build our repository with Chartpress we need to create a git tag. Chartpress will use this tag to determine the version to assign the chart in the index.yaml manifest. Our example chart already has a version 0.1.0 in the Chart.yaml file so let’s create a tag for that.
git tag -a 0.1.0 -m 'Version 0.1.0'
Now we can test this our by running:
chartpress --publish-chart
When you run that command a bunch of things will happen here. The chart will be built and compressed locally and the index.yaml file will be generated. It will then check out the gh-pages branch, commit the new files and push them up to GitHub.
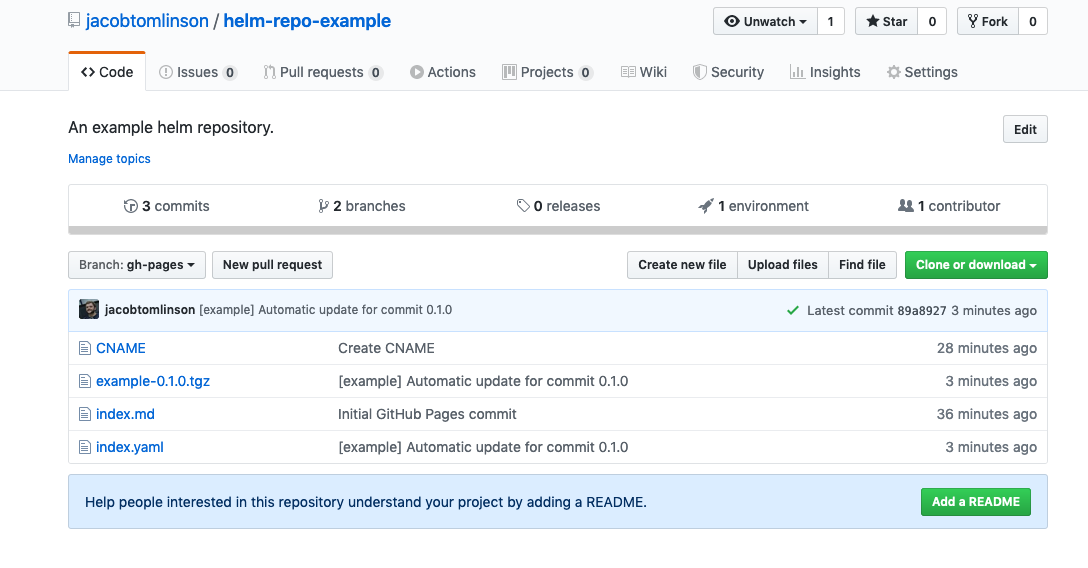
We can check this by visiting our repository on GitHub and selecting the gh-pages branch again. We should now see our index.yaml file along with our first chart release, in my case called example-0.1.0.tgz.
From our master branch on the command line we should be sure to commit our chartpress.yaml config file and push it too.
git add chartpress.yaml
git commit -m "Add Chartpress config"
git push
You will also notice that Chartpress has left the versioned copy of our chart in the repository. We can clean that up with git clean -xffd.
Using our GitHub Pages site for our chart repository
At this point we have successfully published our chart to our repository. We can test this locally with helm by adding our repository and updating our local cache.
$ helm repo add helm-repo-example https://helm-repo-example.jacobtomlinson.dev/
"helm-repo-example" has been added to your repositories

$ helm repo update
Hang tight while we grab the latest from your chart repositories...
...Skip local chart repository
...Successfully got an update from the "helm-repo-example" chart repository
...Successfully got an update from the "stable" chart repository
Update Complete.
In your case you would give your Helm repo whatever local name you like and set the remote URL to your GitHub Pages url helm repo add <name> <gh pages url>.
Optional: Local testing again
We can also test this locally now in the same way we did before. This time we will reference our remote chart in our repository.
helm install helm-repo-example/example --name repo-example
We should get the same output as before and if we follow the instructions we should see the same nginx page as before. This difference is this time anyone can add your Helm chart repo and install your chart.
We could stop here if we wanted. We have a working Helm chart repo and some simple steps to increment versions and add new charts. However there are some extra steps we could do to make this extra helpful.
Adding a human readable front to the repository
Our GitHub Pages site contains our test index.md file and our auto generated index.yaml manifest and example-0.1.0.tgz payload. This is enough for Helm to use the repository but if we navigate to the repo url in our browser we just see our test page from before. This isn’t super useful for humans.
What we could do to improve this is to add a simple static website to give users some information about the charts that are available in the repository.
By default GitHub Pages uses Jekyll to build the contents of the gh-pages site into the static website that you see served at your URL. We can add our own configuration and additional files which Jekyll can use to build a more useful website.
Let’s checkout our gh-pages branch and pull down the upstream changes made by Chartpress.
git checkout gh-pages
git pull origin gh-pages
Ruby environment
Jekyll is a Ruby application and you can optionally install it for local testing.
gem install bundler jekyll
Hint: As I do not regularly write Ruby I tend to use the system installed Ruby distribution that comes with OS X and seems to regularly break with every OS update. Therefore my preferred way of testing local Jekyll sites is to use Bret Fisher’s Jekyll Docker image to ensure a consistent Ruby environment. I even have an alias set up to run the docker image when I use the jekyll command.
Now we can create a Gemfile which contains Ruby dependency information for GitHub Pages to use. This just allows us to be specific about the versions of Jekyll and specific plugins that we may want. Pinning things here should help avoid breakages in the future as it’s likely we wont put much effort into maintaining this Jekyll code.
# Gemfile
source "https://rubygems.org"
gem "jekyll", "~> 3.8.5"
gem "minima", "~> 2.0"
group :jekyll_plugins do
  gem "jekyll-feed", "~> 0.6"
end
gem "tzinfo-data", platforms: [:mingw, :mswin, :x64_mingw, :jruby]
gem "wdm", "~> 0.1.0" if Gem.win_platform?
Configuration
We also need to create a Jekyll configuration file called _config.yaml:
# _config.yaml
title: Our example Helm chart repo
description: A chart repo for storing charts.
theme: minima
url: "https://helm-repo-example.jacobtomlinson.dev/"
repo_name: helm-repo-example

exclude:
  - Gemfile
  - Gemfile.lock
  - .gitignore
This config file is quite minimal, we are including a title, description and theme for Jekyll to use along with the url and preferred repo name (the name we assume users will give their local copy) that we have published our chart repo at. We are also excluding some files from the Jekyll build.
Data sources
Jekyll is able to pull in YAML data sources when it builds it’s templates. We already have a YAML file with all the information about our charts in, the index.yaml file that was generated by Chartpress and is used by Helm. However Jekyll assumes all data sources will be located in a directory called _data. On *nix systems we can work around this by creating this directory and making a symbolic link to the index.yaml file.
mkdir _data
cd _data
ln -s ../index.yaml index.yaml
cd -
Helm chart repo index
Now that we have everything set up for Jekyll to build we need to update the pages that we want built. We want to replace our index.md file with a more complex one which loops over the charts in our index.yaml file and then over the releases within each chart laying them out in a useful way for the user to see.
Here is an example index.md file I created for the Dask helm chart repo. It should be generic enough to be useful in many other Helm chart repos but you are welcome to modify it and add your own information. For now let’s copy this into your index.md file.
---
layout: default
---

## Getting Started

{{ site.description }}

You can add this repository to your local helm configuration as follows :

```console
$ helm repo add {{ site.repo_name }} {{ site.url }}
$ helm repo update
```

## Charts

{% for helm_chart in site.data.index.entries %}
{% assign title = helm_chart[0] | capitalize %}
{% assign all_charts = helm_chart[1] | sort: 'created' | reverse %}
{% assign latest_chart = all_charts[0] %}

<h3>
  {% if latest_chart.icon %}
  <img src="{{ latest_chart.icon }}" style="height:1.2em;vertical-align: text-top;" />
  {% endif %}
  {{ title }}
</h3>

[Home]({{ latest_chart.home }}) \| [Source]({{ latest_chart.sources[0] }})

{{ latest_chart.description }}

```console
$ helm install {{ site.repo_name }}/{{ latest_chart.name }} --name myrelease --version {{ latest_chart.version }}
```

| Chart Version | App Version | Date |
|---------------|-------------|------|
{% for chart in all_charts -%}
{% unless chart.version contains "-" -%}
| [{{ chart.name }}-{{ chart.version }}]({{ chart.urls[0] }}) | {{ chart.appVersion }} | {{ chart.created | date_to_rfc822 }} |
{% endunless -%}
{% endfor -%}

{% endfor %}
There are a few sections to our markdown document here.
We start with the frontmatter. This is necessary as Jekyll will only build pages that start with this, we are also specifying that we want to use the default layout from the minima theme we selected in the config.
Then we have an intro section with instructions on how to add the chart locally. These values are being dynamically grabbed form the Jekyll config.
We then iterate over each chart, print out some information about the chart and then display a table of all the releases that are available in the repo.
We can test this locally by running jekyll serve and navigating to http://localhost:4000.
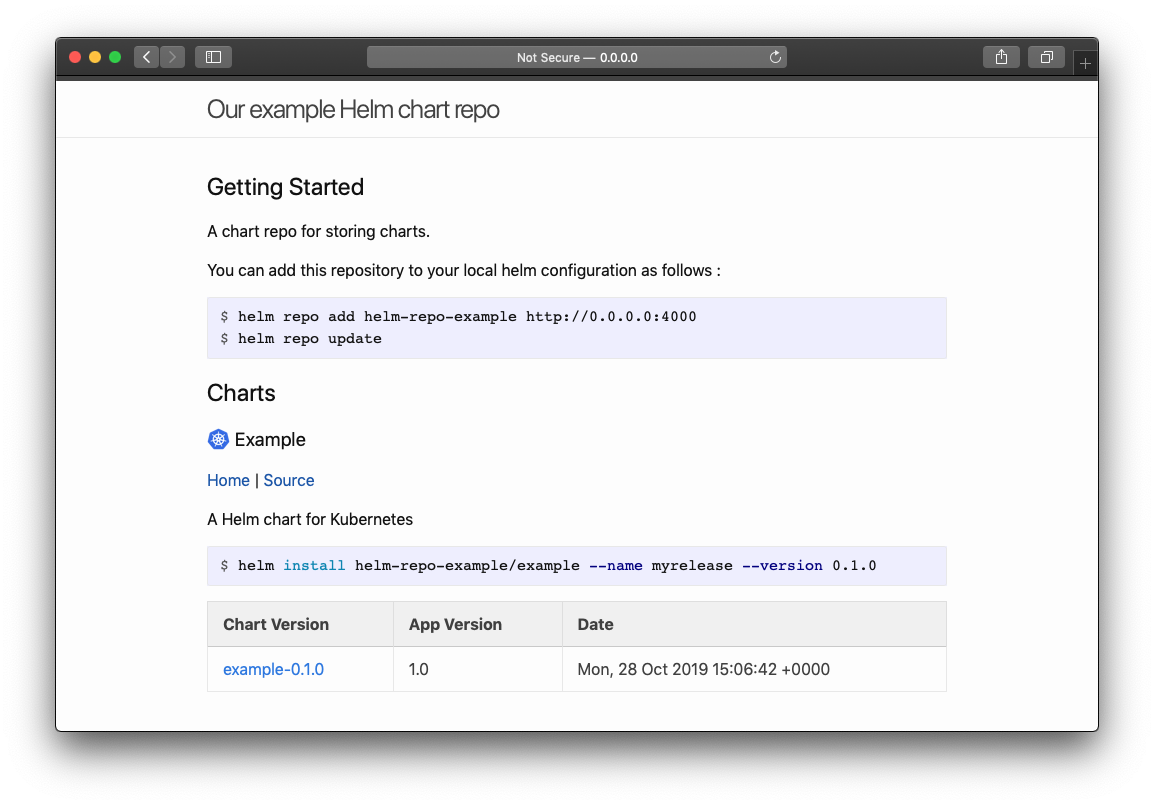
We can see here that our install instructions have been filled in with our information. Note that it shows the URL as 0.0.0.0:4000 because we are testing locally, this will show the correct URL when built by GitHub pages.
We can then see our example chart (it even has the Kubernetes icon we added to the Chart.yaml file earlier). Then we have an example install command to install the chart and the table containing our 0.1.0 release.
This view is far more useful to a human who is looking to install charts from our repo than trying to read a YAML file.
To finish off let’s commit these changes and push them up so they go live on GitHub Pages.
We don’t want to include the .sass-cache or _site directories which will have been created if you ran jekyll serve, so let’s add those to a .gitignore file.
# .gitignore
.sass-cache
_site
git add -A
git commit -m "Add human readable Jekyll site"
git push origin gh-pages
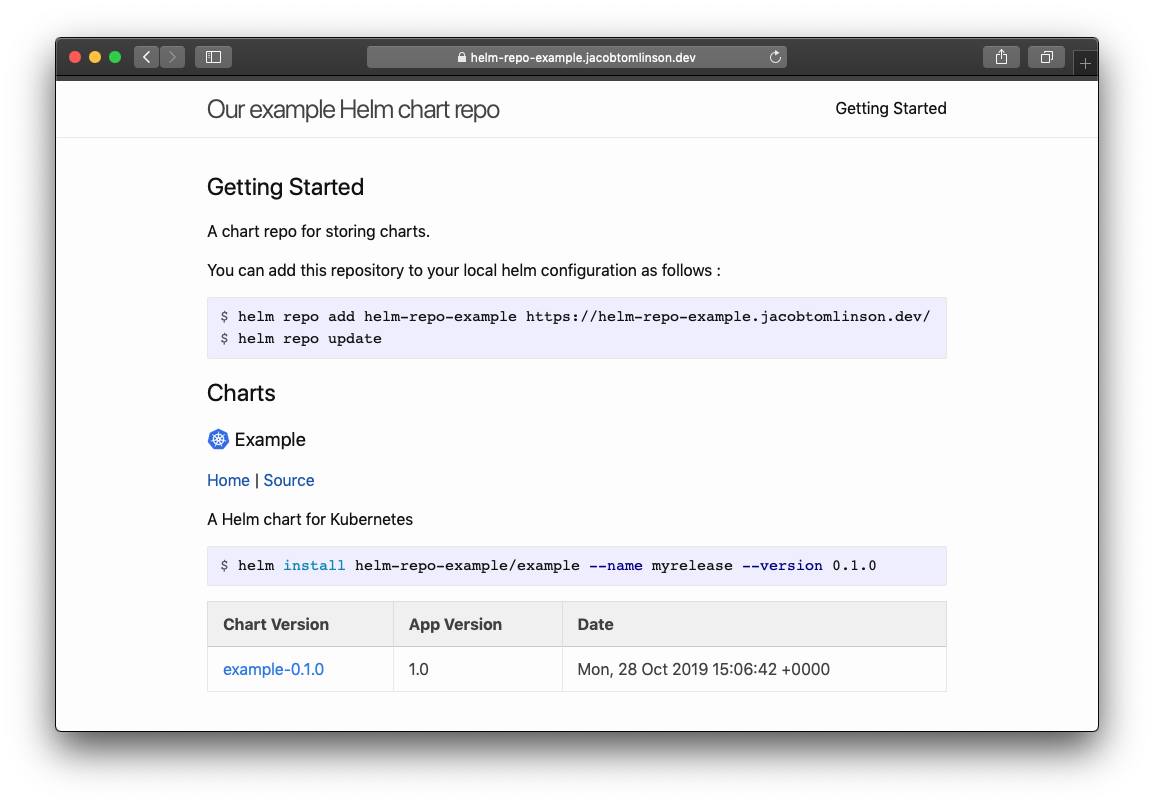
We can then visit our GitHub Pages URL and check we see the same thing we saw locally with the correct URL.
Now that we have this Jekyll template in place every time we update our charts with Chartpress it will push a commit to the gh-pages branch and will automatically build a new version of the page pulling in new information from the index.yaml manifest, so we likely won’t need to touch this code again unless we want to change the layout.
Automating deployments with Travis CI
Instead of manually running Chartpress when we tag our charts in our git repository we can also automate this step with Travis CI.
To do this we need to create and encrypt a deploy key for Chartpress to use when being run remotely by Travis (when we ran Chartpress earlier it used out local SSH keys).
First we need to switch back to our master branch (hopefully after this we won’t really need to interact with the gh-pages branch again).
git checkout master
Now we need to generate a new SSH key to use for deploying our repo.
ssh-keygen -t rsa -b 4096 -q -N "" -C "" -f $PWD/deploy_key
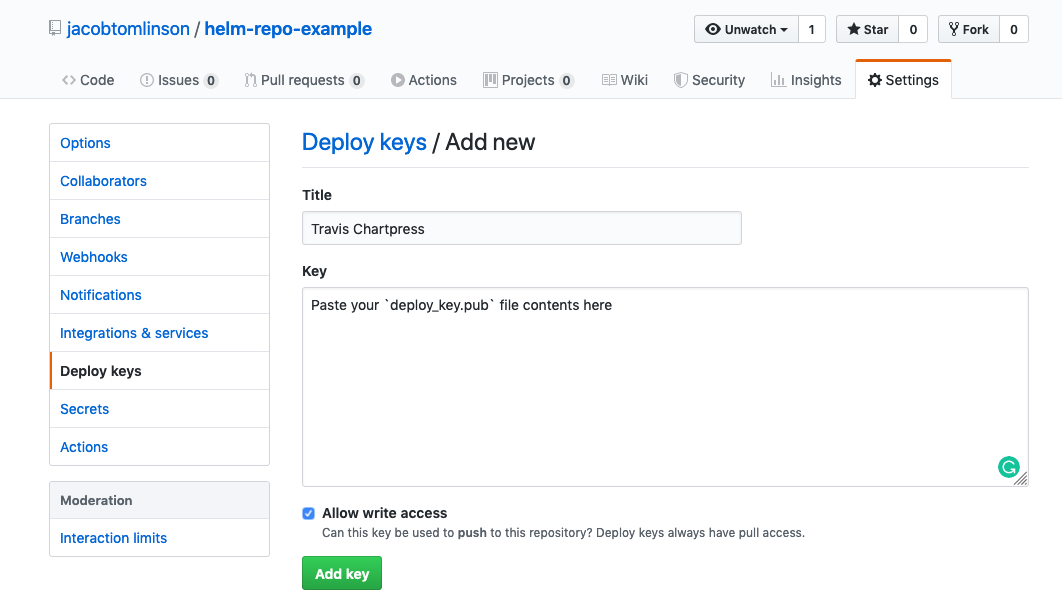
This will generate two files: deploy_key and deploy_key.pub. We now need to visit the “Deploy keys” section of our repository on GitHub and create a new key with the contents of our deploy_key.pub file. Give it a name and be sure to tick the Allow Write Access box so that we can push to the gh-pages branch with it. You’ll be prompted for your password and then the key will be created.
Next we need to encrypt our private key file and allow Travis to decrypt it. There are some neat tools in the Travis CI CLI tool for doing this. Instructions for installing and configuring the CLI can be found here.
Once you have your CLI configured you can tell Travis to encrypt the file and update the .travis.yml file to decrypt the file when the job runs.
travis encrypt-file deploy_key --com --add
We also want to make sure our unencrypted keys don’t make it into the git repo, so let’s add them to a .gitignore.
# .gitignore
deploy_key
deploy_key.pub
We also need to update our .travis.yml file to install Chartpress after it installs Helm.
install:
  # ... other install commands
  - pip install chartpress
And we also need to add a deploy section to tell Travis to run the Chartpress publish command when it build a commit with git tags.
deploy:
  - provider: script
    skip_cleanup: true
    script: chartpress --publish-chart
    on:
      branch: master
      tags: true
We also need to tell Chartpress to use our deploy keys. We can do this by adding an env section to our .travis.yml file and setting the GIT_SSH_COMMAND variable.
env:
  - GIT_SSH_COMMAND="ssh -i ${PWD}/deploy_key"
Finally we need to change the permissions on our key as ssh will refuse to use it unless it has very conservative permissions.
before_install:
  # ... Autogenerated travis command...
  - chmod 400 deploy_key
We can now pull all this together by committing our changes, creating a new tag for 0.1.1 and letting Travis do it’s thing.
git add -A
git commit -m "Automate deployment"
git tag -a 0.1.1 -m 'Version 0.1.1'
git push && git push --tags
Now if we wait a minute or two for Travis to run our build and deploy our tag we can then refresh our chart repo page and see the new 0.1.1 release listed in the table.
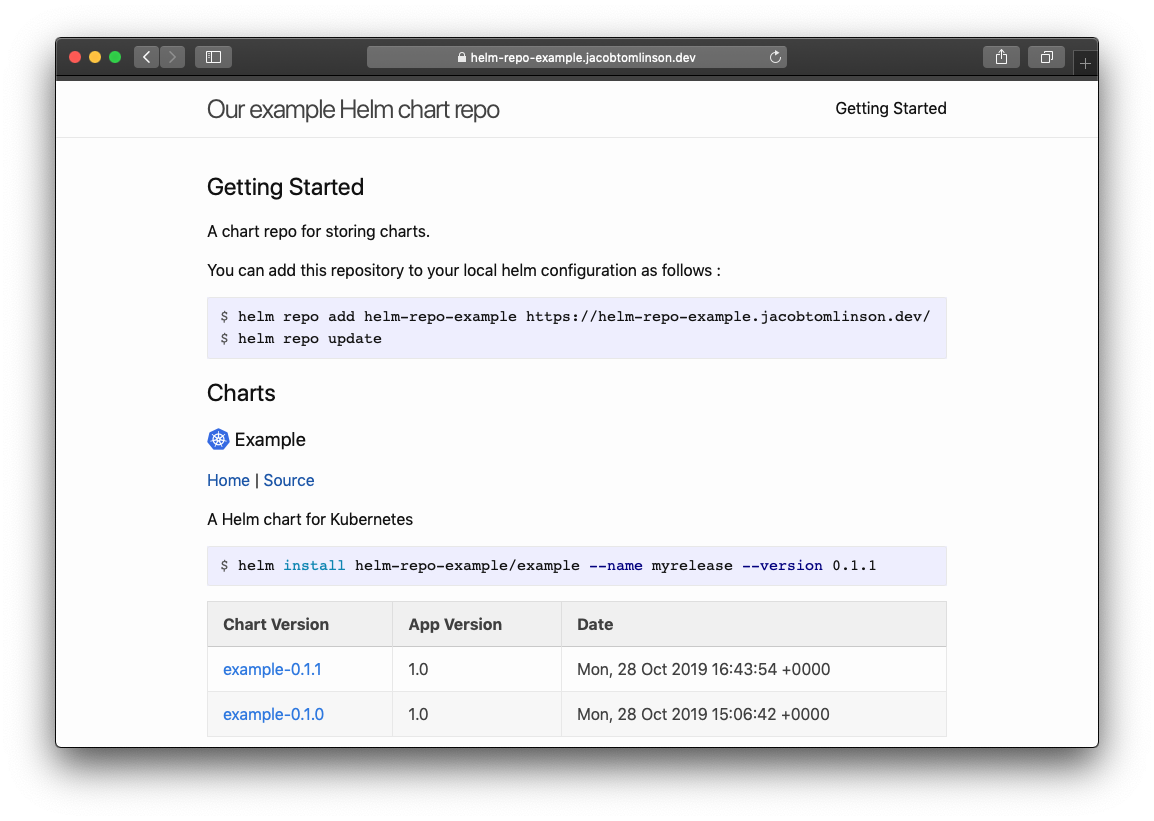
Now in future to push new versions of our chart we just make our changes, tag our commit and push to GitHub, everything else is automated after that.
Registering your chart repo on Helm Hub
Lastly we may want to register our chart repo with Helm Hub if we want people to be able to search and find our charts.
We can do this by adding our chart to the list of indexed charts.
To do this you need to raise a PR against the Helm Hub repo with the following changes.
Add your repo to config/repo-values.yaml:
sync:
  repos:
    # ... other repos
    - name: <your-chart-name>
      url: <url to your GitHub pages repo>
And also to repos.yaml:
repositories:
  # ... other repos
  - name: <your-chart-name>
    url: <url to your GitHub pages repo>
    maintainers:
      - name: <Your name>
        email: <your email address>
For more information check out the Helm Hub docs.
Once you’ve done this and your PR has been merged you should see your charts listed on Helm Hub. When you make new releases of your chart Helm Hub will update within a few hours.
Wrap Up
This has turned into a bit of a monster guide. We have covered:
- Creating an example Helm chart on GitHub.
- Linting your chart automatically with Travis CI.
- Creating a GitHub Pages site for your git repo.
- Building a Helm chart repository for your chart and publishing it with Chartpress.
- Adding a human readable frontend to your chart repo with Jekyll.
- Automating the deployment of your chart with Travis CI.
- Adding your helm chart repo to Helm Hub.
That’s a lot of stuff so thanks for bearing with me.
You can find all the code and configuration from this post in the example GitHub repository here.